How to audit your Pinterest Page or Profile
How to audit your Pinterest Page or set up from scratch is extremely important in terms of how you are found within the Pinterest search engine. Pinterest is not only a social network, but it is also quite the search engine. I use Pinterest over Google often when searching for so many things, from latest fashion to homemade ant killer (I looked that one up the other day, found a recipe and ants are gone!).
Another bonus is Google often indexes images on Pinterest, so more reason keywords are critical!
Let’s review some stats about Pinterest and why your business should be using it.
- 100 million monthly active users
- Not just for women, 1/3 of users is men
- Search is up 81 percent year over year
- 2/3 of content pinned from a business site, like a retail site or blog
- More than 1/2 of Pinterest users choose Pinterest over Google search
- 2/3 of all Pins are from a business’ website
This is to just name a few. My personal experience with my clients is when we make Pinterest one of our top social media sites of focus, it becomes the #2 traffic source, right behind Google. Minimally, it ends up in the top 10 traffic to their site. What’s that say? It is documented time and again to be a massive source to bring traffic to a website.
So, before you get started on Pinterest, or even if you already have, let’s set up your page to be the most robust it can be for search and for your brand.
Steps to Audit and Set up your Pinterest Page
#1: Professional Profile Pic (Logo if business, Headshot if your brand)
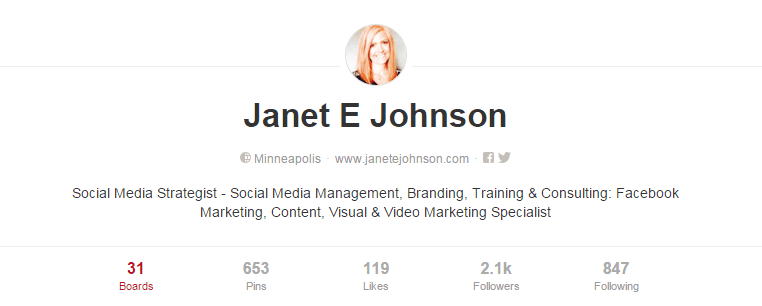
#2: Proper Name at Top
Just make sure this matches all your other platforms. I go by ‘Janet E Johnson’ for business, but on personal profiles I often just use ‘Janet Johnson’.
#3: Keywords in the ‘About you’ section
As you can see, I have numerous keywords for my industry: social media strategist, social media management, branding, training, consulting, Facebook marketing, visual, video marketing. It is filled with as many keywords as I could and with my main focus keywords. They allow 160 characters, so use those characters as best you can to fill it with keywords.
#4: Have Username that matches other social sites
Try the best you can to have the same username as your other social sites. So, if your Facebook is Facebook.com/lakevilleorthodontics, then create Pinterest to be Pinterest.com/lakevilleorthodontics.
#5: Set up as Business Account
I originally set up my account as a personal profile before Pinterest even launched business accounts. If you happened to have done this as a personal brand, they should have alerted you to switch to a business account. I highly suggest doing this so you can track the analytics.
If you do not have a Pinterest account and want to set it up for your business, here is the LINK to get started.
#6: Verify Website
In order to properly track using Pinterest analytics, you need to add a meta tag or html code provided by Pinterest to your website. (Note: This is similar to my other post on adding the Facebook Pixel to your website). Head HERE for an explanation on how to get verified.
#7: Set up Rich Pins
Head HERE to learn more about Rich Pins. They are pins that include extra information right on the pin itself. There are 6 types of Rich Pins: app, movie, recipe, article, product and place. I highly suggest to set up these (or have your developer do it) on your website.
#8: Add Location if local
When you pin as a local business, I suggest adding into each of your descriptions the city and state. It is more likely to be found in search. Social Media Examiner just came out with a post on How to use Pinterest for Local Business that provided additional tips.
#9: Link Social Accounts to Pinterest
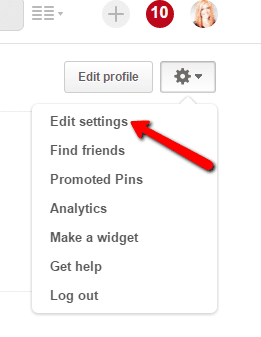
You can link Facebook, Twitter and Google+ inside your settings. To access this, see image below.
Another suggestion is to use IFTTT to link a platform to Pinterest. IFTTT sets up recipes for one platform to post to another. For instance, I have my Instagram linked whenever I use the hashtag: #socialmediatip. When I post an image with that hashtag on Instagram, it automatically posts to my ‘Social Media Tips’ Pinterest board. I don’t suggest this for everything because sizing and wording is different, but can help to do once in a while to streamline the process.
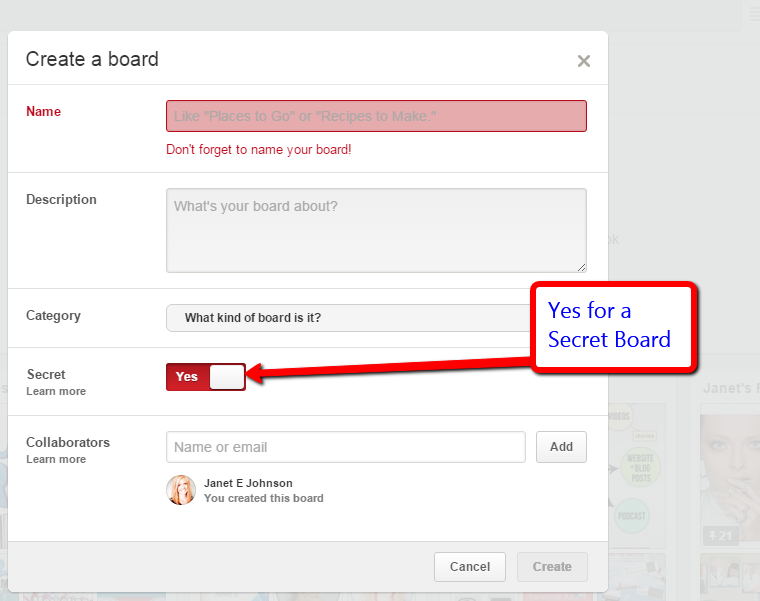
#10: Have at least 5 boards (preferably 10 boards)
If you are just launching your Pinterest account for the first time, set up 5-10 boards as ‘secret boards’. Add 5-10 images per board. Then change them to public.
#11: Have at least 5 pins per board
5 pins per board is the minimum. It is suggested to aim for at least 10 pins. The most successful boards usually have at least 10.
#12: Each board has keywords
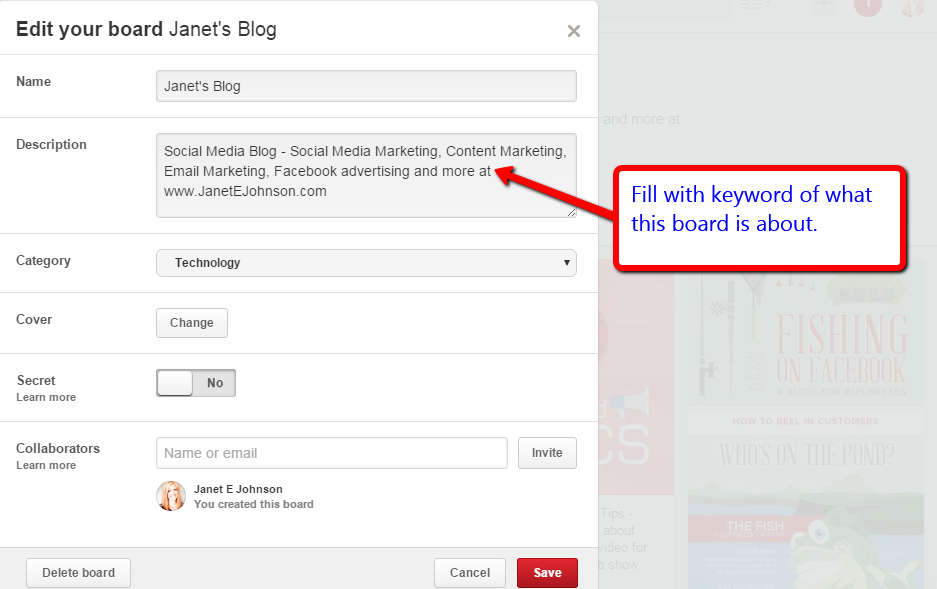
#13: Each description uses keywords
It has been documented that longer descriptions with lots of keywords get shared more than short descriptions. Don’t make it spammy, but fill it in as much as you can.
#14: Regularly Pin Content
I use the Tailwind App to help me with this. They have a system that fills in best times to post. I go in and share my own content and other content each day and just click ‘add to que’. It automatically feeds it in. A que schedule looks like this.
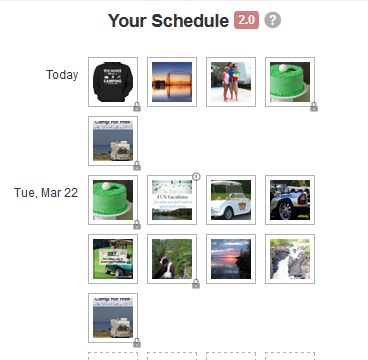
One aspect I love about the Tailwind App is I can post one image to multiple boards and Tailwind automatically spreads it out for you by a day or many days, whichever you choose. It streamlines and saves so much time.
#15: Regularly Follow and Like Others
I like to follow, like and comment often on content that I will be pulling from.
#16: When you upload your own images, name the file the focus keyword. This can give an extra search push.
You know how you sometimes have weird file names, such as fbimage.jpg. Rename it to FOCUSKEYWORD.jpg. This can also help with being found in search.
Were there some new things you didn’t know about Pinterest marketing in this list? I’d love to hear what stood out to you!

